Water-Damage Restoration: Documentation, Specialist Work and Waste
Water damage is a nightmare for a homeowner, whether it comes from a storm, a burst pipe, a backed-up sewer line or a failed appliance. The restoration itself is specialist work, and it runs alongside two other jobs that fall to you: documenting the damage for your insurer and getting the ruined material out of the house. This guide walks through all three in the order they need to happen, and it separates what a restoration team does from what a residential dumpster rental does, because they are not the same thing.
Before You Start: Know What Kind of Water You’re Dealing With
Restoration specialists classify water damage by contamination, and the category determines what can be dried and saved versus what has to be removed.
Clean water comes from a potable source and poses no immediate health risk: a supply line break, rainwater, melting ice. If it isn’t dried quickly, it degrades to the next category.
Gray water is contaminated and not safe to drink. It carries detergents, urine or seepage from appliances and storage tanks.
Black water is grossly contaminated and can cause serious illness. Sources include sewer backups, toilet overflows and floodwater from rivers, streams or storm surge. Anything porous that black water touched is generally removed, not cleaned.
You don’t need to make this call yourself; a restoration technician will. But knowing the categories helps you understand why so much material comes out of a flooded house.
Step 1: Document the Water Damage Before Anything Moves
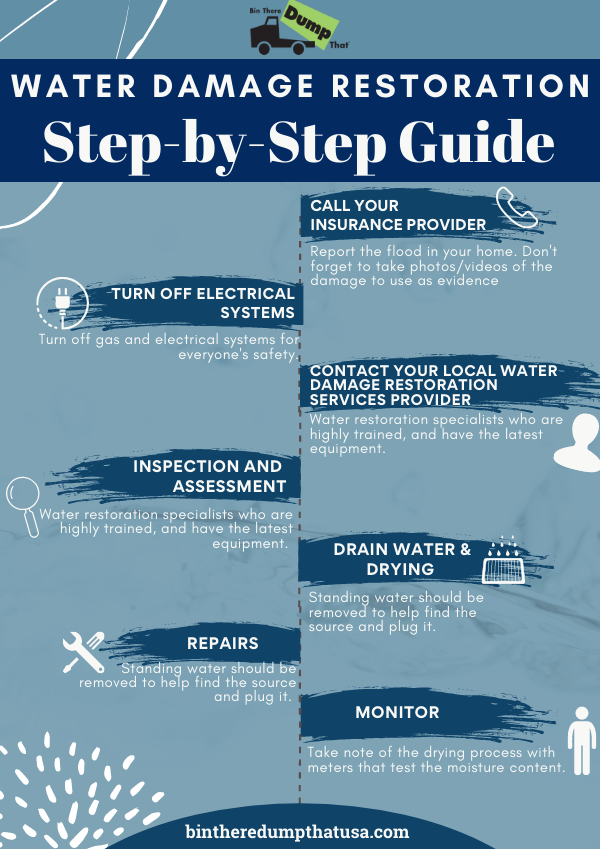
Call your insurer first. Report a flood to your flood insurance provider; report a burst pipe, appliance failure or roof leak to your homeowner’s insurer. Ask what they need from you before cleanup starts, and get the claim number.
Then build a record. Photograph and video every affected room, wide shots and close-ups, including water lines on walls, the source of the water if you can see it, and each damaged item. Make a written inventory as you go: item, approximate age, purchase price if you know it, and where it was. Keep damaged items until the adjuster has inspected them or has told you in writing that you can dispose of them. Keep receipts for everything you spend on emergency measures such as tarps, pumps or temporary lodging.
After the adjuster’s inspection you will typically be asked to sign a proof of loss. Read it against your inventory before you sign.
Step 2: Check Official Reentry and Contamination Advice
If the home was evacuated or the water was deep, don’t go back in on your own say-so. The CDC’s guidance on reentering a flooded home (US; accessed October 2026) says a damaged home should be examined by a building inspector before reentry, that power should stay off until an electrician has checked the system, and that you should assume floodwater may carry sewage and mold. Turn off gas and electrical systems before entering if you can do so from a dry location; if you’d have to stand in water to reach the panel, leave it to the utility or an electrician.
The EPA’s guidance on flood cleanup and indoor air (US; accessed October 2026) adds the time pressure: materials that stay wet for more than about two days usually grow mold, so dry the home and everything in it within 24 to 48 hours if you can, and assume mold on anything that stayed wet longer. Flood cleanup is physically hard and can be dangerous; children, older adults and anyone with respiratory conditions should stay out of it. The EPA also notes it does not certify or list flood cleanup contractors, so vet the company yourself (see Step 3).
In Canada, Health Canada’s guide to addressing moisture and mould indoors (Canada; accessed October 2026) gives the same 48-hour window for mould growth, recommends against air testing for mould, and advises that large areas of mould should not be cleaned up by an unqualified person. Provincial and municipal rules govern reentry and debris handling; US federal guidance does not apply north of the border, and local operator policies apply everywhere.
Step 3: Coordinate Your Insurer and the Restoration Specialists
Water damage restoration is a licensed trade in most places and is not a do-it-yourself job beyond the smallest clean-water incident. A qualified restoration company will:
Inspect and assess with moisture meters and sensors, mapping how far water travelled into walls, floors, ceilings and fixtures, and classifying the contamination.
Extract standing water and stop the source.
Dry and dehumidify with air movers and dehumidifiers, often drilling into baseboards and lifting carpet so cavities dry too.
Remove unsalvageable material: saturated drywall, insulation, carpet and pad, swollen cabinetry and subfloor, and contents that can’t be sanitized.
Treat for mold where growth has started, and keep the HVAC off until it has been checked so spores aren’t pushed into clean rooms.
Monitor moisture readings over several days until they stabilize, then remove equipment.
Since no government body certifies these companies, ask for references, proof of insurance and any industry certification they hold. Get the scope of work in writing before they start, and make sure it says who is responsible for removing demolition debris and contents. Some restoration companies haul everything; many tear out and bag but leave disposal to the homeowner. That line determines whether you need a dumpster at all.
Step 4: Keep Remediation Separate From Container Rental
A dumpster rental is a container and a haul. It is not remediation, it does not include labor, and the rental company doesn’t decide what is safe to reenter or what has to come out of your walls. Those calls belong to the restoration team, your insurer and, where applicable, your local building department.
What a residential dumpster rental does is give the tear-out somewhere to go the same day it happens, which matters when the EPA clock is running. The bin sits in your driveway on protective boards, you or the restoration crew load it as material comes out, and it’s hauled when you call. Confirm with your local operator how long the bin can stay, what the weight allowance is (wet drywall and carpet are heavy), and what they will and won’t accept.
Step 5: Plan Approved Material Removal
Not every damaged item can go in a residential dumpster, and the rules vary by operator, by municipality and by what the water carried. Before loading, sort the tear-out into three groups:
Generally accepted construction and household debris: drywall, carpet and pad, wood trim, cabinetry, furniture, mattresses, boxed contents. Confirm mattress and bulky-item handling with your local operator.
Items that need a separate route: refrigerators and freezers, other appliances, electronics, paint and solvents, propane, batteries, and anything containing refrigerant or fuel.
Contaminated material that needs a decision first: anything soaked by black water. Your restoration company and local waste authority set the handling rules; sewage-soaked debris may be accepted bagged, may need a specific facility, or may be refused.
When the restoration company declares the home dry, ask for their final moisture readings, the equipment log, the mold treatment record if any, and a completion letter. Keep these with your claim file, your photos and your disposal receipts (the dumpster invoice counts). Insurers may ask for them, buyers and inspectors may ask for them when you sell, and if damage reappears, dated evidence of what was done is what separates a new claim from a disputed one.
Expect some follow-on repairs after the crew leaves: warped doors, a faucet that drips, cabinet hardware that corroded. Budget for them and document those too.
Related Restoration and Damaged-Material Guides
This page covers the whole-house process. These guides handle specific situations:
Restoration is the specialist’s job. Getting the damaged material out of your house quickly, so the drying can work and the rebuild can start, is where a bin in the driveway earns its keep. Find your local Bin There Dump That to confirm availability and what they accept.