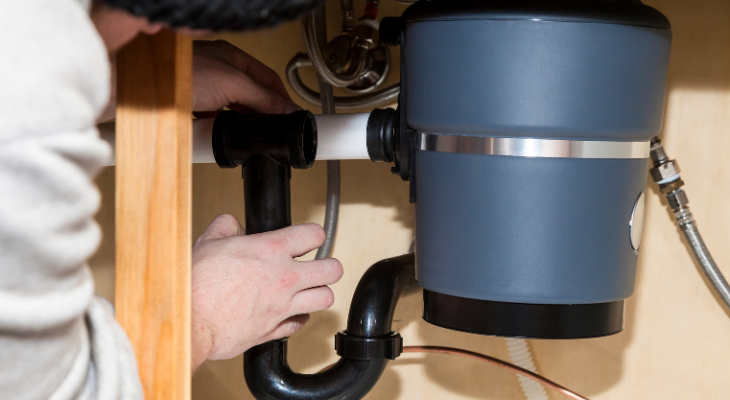
Garbage Disposal Installation: Compatibility, Preparation and Help
Replacing a garbage disposal (a garburator, in much of Canada) is a small job that goes wrong in predictable ways: the new unit doesn't fit the sink flange, the electrical supply isn't what the manufacturer specifies, the dishwasher won't drain because a knockout plug was left in, or the municipality turns out not to allow the appliance at all. This page is the assessment to do before you buy or book anything: whether a replacement is compatible with your sink, plumbing, power and local rules; what the manufacturer's instructions require; which parts of the job belong to a licensed trade; how to protect the cabinet; what to do with the old unit; and how to confirm the job is done. It sits inside the wider task of planning a renovation, where you define renovation goals before requesting quotes; this page covers the one appliance.
Step 1: Check Unit and Plumbing Compatibility
Garbage disposals are not universal. Before choosing a unit, check each of these against what's under your sink:
Check
What to look at
Why it matters
Sink drain opening
Diameter of the drain hole; sink material and thickness
Mounting flanges are made for a standard opening; thick fireclay or very thin stainless sinks may need a different mount or adapter
Mounting system
Brand and type of the existing mount (if replacing)
Same-brand replacements may reuse the mount; a different brand usually means replacing the flange and mounting ring
Cabinet space
Height from sink underside to cabinet floor; width beside the P-trap
Larger motors are taller; measure before buying, especially under deep sinks or with a water filter installed
Drain and trap
Position and height of the drain outlet into the wall; double-bowl layout
The discharge elbow must reach the trap without sloping uphill; double bowls need a tee and may need a baffle
Dishwasher
Does the dishwasher drain through the disposal?
The new unit needs a dishwasher inlet, and its knockout plug must be removed before connecting; a plug left in is the most common cause of a dishwasher that won't drain after the job
Electrical supply
Plug-in outlet under the sink or hardwired? Switch location? Circuit rating?
Units ship for plug-in or hardwired connection; some models require a separate cord kit; the circuit and switching must match the manufacturer's rating
Septic system
Is the house on septic?
Some manufacturers offer septic-rated models; many septic professionals advise against disposals altogether. Ask yours
Local rules
Municipal sewer-use bylaw or plumbing code
Some Canadian municipalities restrict or prohibit garburators under their sewer-use bylaws, and some US jurisdictions have historically restricted them. Check before buying, not after
Step 2: Review Manufacturer Requirements
Every unit ships with installation instructions, and the major manufacturers publish them online with support pages and videos. Read the one for the model you're considering before you buy it, and treat it as the authority over any general guide, including this one. The items to confirm from the instructions:
Required sink opening size and any adapter for your sink type.
Electrical connection type (cord kit or hardwire), circuit requirements and whether a switch or air switch is required for the model.
Dishwasher connection method and whether a knockout plug applies.
Sealant specified for the flange (plumber's putty or a specific sealant; some sink materials require one over the other).
What voids the warranty, which frequently includes installation that doesn't follow the instructions.
Tools and supplies the instructions typically call for
Having these on hand before the old unit comes out keeps the sink out of service for hours rather than days:
The disposal and its mounting assembly (usually included), plus a cord kit if the model needs one.
Plumber's putty or the sealant the manufacturer specifies.
Screwdrivers, an adjustable wrench, the disposal wrench or "wrenchette" supplied with the unit, and pliers for hose clamps.
A hacksaw or tubing cutter if the discharge tube or trap needs trimming.
Wire nuts, electrical tape and a voltage tester if the connection is hardwired.
A bucket, towels and a flashlight; a helper to hold the unit while it's mounted.
Step 3: Define Professional Work
Where the line between do-it-yourself and licensed work falls depends on your jurisdiction and your own competence, but these are the usual boundaries:
Electrical. Plugging a corded unit into an existing, correctly rated outlet is homeowner work almost everywhere. Installing a new outlet, running a new circuit, adding a switch, or hardwiring a unit is electrical work that in many jurisdictions requires a licensed electrician and may require a permit.
Plumbing. Swapping a like-for-like unit on existing drain connections is generally homeowner work. Re-plumbing the drain, moving the trap, or adding a dishwasher connection where there wasn't one may need a plumber and, in some places, a permit.
Anything that changes the sewer connection. Where a bylaw restricts disposals, the question isn't who does the work but whether it can be done at all.
If a licensed trade is doing part of the job, get a written quote that names the unit (or says who supplies it), the electrical and plumbing scope, and whether removal of the old unit is included.
Step 4: Protect Cabinets and Access
Before the old unit comes out: turn off the power at the breaker and confirm it's off at the unit; shut off water if the supply lines will be disturbed; empty the cabinet completely; and put down towels and a shallow pan, because the trap and the old unit will hold water. Set aside the dishwasher drain hose and label which clamp went where. If the cabinet floor shows old water damage, note it now; a swollen or delaminated floor is a renovation item, not a disposal item, and you'll want the record before anyone attributes it to the new install.
Step 5: Plan Old-Unit Removal
A garbage disposal contains a motor, copper windings and a steel or plastic grinding chamber, and it doesn't contain refrigerant or other regulated materials. In most municipalities it's accepted as scrap metal or small-appliance recycling rather than general trash, and retailer take-back programs sometimes apply when a new unit is purchased. If the disposal is coming out as part of a larger kitchen job, it goes with the other removed appliances; at that point, arrange removal of old household appliances so the disposal, the dishwasher and anything else leaving the kitchen follow their correct routes together.
Step 6: Confirm Post-Installation Checks
Whether you or a trade did the work, run through these before closing the cabinet:
Run water and operate the unit; listen for grinding, humming without turning, or rattling (a knockout disc left in the chamber makes itself known here).
Check every joint for leaks with a dry paper towel: sink flange, discharge elbow, trap, dishwasher inlet.
Run the dishwasher through a drain cycle and watch the connection.
Confirm the reset button and, if fitted, the hex-key access at the base are reachable.
Keep the instructions, the receipt and the warranty registration together; note the install date and who did the electrical and plumbing.
If anything in the compatibility table turned out to be wrong after the fact (the wrong flange, an undersized circuit), fix that before relying on the unit rather than working around it.