Tile Floor Removal: Preparation, Tools and Debris Disposal
Pulling up ceramic tile is one of the most doable demolition jobs in a renovation, but it's slow, loud and heavier than it looks. How it goes depends on what's under the tile, what the tile was set in and how much of the room has to stay intact. Here's how to plan the job, which tools to use, how to lift the tile and where the debris goes. If you're still deciding what goes down next, start by learning how to choose household flooring.
Step 1: Assess the Tile and the Subfloor
Before you buy or rent anything, find out what you're dealing with. Pull a floor vent cover or look at the edge of the tile at a doorway, and check the basement or crawlspace ceiling if you have one.
What's under the tile
What to expect
Concrete slab, tile set in thinset
The most common setup on slabs. Tile comes up with a chisel or rotary hammer, but thinset stays bonded and needs scraping or grinding.
Cement backer board over plywood
Often easier to remove the tile and backer board together by unscrewing or prying up the board in sections.
Tile set directly on plywood
Tile can come up fast, but the plywood is easy to gouge. Plan to patch or replace damaged areas.
Thick mortar bed (common in older homes)
A layer of mortar, sometimes over wire mesh, can be an inch or more thick. Very heavy and slow; many homeowners hire this out.
Ceramic laid over older vinyl or sheet flooring
Stop and test before demolition (see Step 2).
Porcelain tile is denser and harder than standard ceramic, so expect it to break into sharper pieces and take longer. Our comparison of porcelain vs. ceramic tile explains the difference if you're not sure which you have.
Step 2: Check for Hazardous Materials
Asbestos: the EPA's asbestos page for homeowners (updated June 2026) lists older vinyl floor tiles, the backing on vinyl sheet flooring and some flooring adhesives among the products that may contain asbestos. Ceramic tile itself isn't the concern, but older layers or black adhesive found under it can be. Have suspect material tested before you break it up, and don't disturb it yourself if it tests positive.
Lead paint: removing tile usually means pulling baseboards and trim. The EPA's RRP program page for consumers (updated May 2026) says homes built before 1978 are more likely to have lead-based paint.
Canada: Health Canada's DIY chemical safety page (modified June 2023) uses 1990 as the cutoff for possible asbestos and 1991 for lead paint.
Dust: breaking tile and grinding thinset creates fine dust. Wear a properly fitted respirator rated for fine dust, and keep the work area closed off from the rest of the house.
Step 3: Choose Your Tools, or Get Help
Job
Tools
Removing trim and baseboards
Utility knife, flat pry bar, putty knife
Small room or a few tiles
Hammer, cold chisel or brick set, long-handled floor scraper
Large area
Rotary hammer with a wide chisel bit, or a rented powered floor scraper
Thinset left on concrete
Floor scraper, rotary hammer chisel bit, or a rented grinder with dust collection
Cutting backer board free
Drill/driver to back out screws, pry bar, oscillating tool
Safety gear
Wraparound safety glasses, heavy work gloves, knee pads, hearing protection, respirator, long sleeves and work boots
Cleanup
Heavy-duty contractor bags or buckets, shop vacuum with a fine-dust filter, flat shovel
Read the operating instructions for any rented power tool before you start. Call a flooring contractor if the tile sits on a thick mortar bed, covers a large open area you need done fast, or might be over material that needs testing. Get two or three written quotes for the same scope, and ask if hauling the debris is included.
Step 4: Protect What Stays, Then Lift the Tile
Protect the room
Move furniture out and remove the toilet, vanity or appliances that sit on the tile.
Seal doorways with plastic sheeting and cover floor vents to keep dust out of the heating and cooling system.
Protect cabinets, tubs and adjoining floors with cardboard or plywood. Tile shards chip enamel and wood.
Score caulk along tubs and cabinets before prying anything loose.
Remove the tile
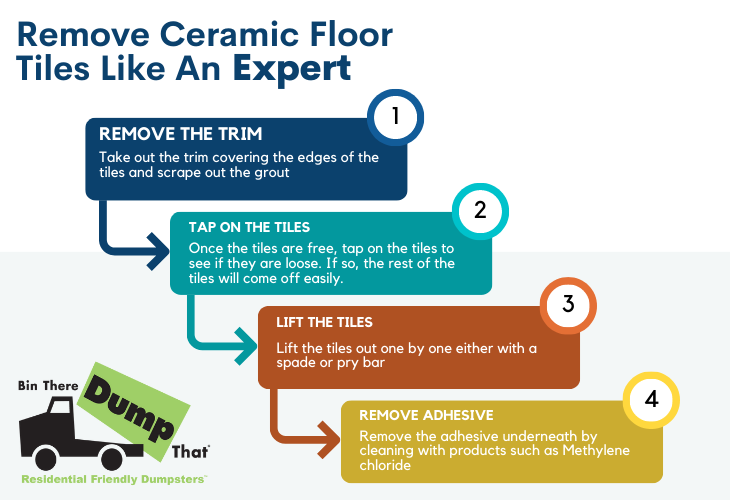
Pull baseboards, shoe molding and transition strips, and label any trim you plan to reuse.
Find a starting point: a cracked or loose tile, or the edge at a doorway. If every tile is solid, break one in the center with a hammer.
Hold the chisel or scraper at a low angle and drive it under the tile, not down into it. Work outward row by row.
For large areas, switch to a rotary hammer or powered scraper and let the tool do the work.
Load broken tile into buckets or bags as you go so the floor stays safe to walk on.
Scrape or grind off leftover thinset until the surface is flat enough for the new floor. Stubborn adhesive, damaged plywood and other surprises are covered in our page on tile removal problems.
Step 5: Plan for Heavy Debris
Tile, thinset, mortar and backer board are dense. A single bathroom or kitchen can fill several buckets that are too heavy to lift easily, and a mortar bed adds far more. A few things to plan ahead:
Don't overfill bags or buckets. Keep each one light enough to carry safely.
Plan a clear, protected path from the room to the door.
Check what your regular trash pickup accepts. Many curbside programs limit or refuse construction debris.
Tell your dumpster provider you're disposing of tile and mortar, since heavy materials affect which container size and weight allowance fit.
Step 6: Arrange Collection
Have the container in place before demolition day so you can load as you work. For one or two rooms of tile, a small dumpster rental is often enough because heavy debris fills a container's weight allowance before it fills the space. If the flooring job is part of a larger remodel, a residential dumpster rental can take the old cabinets, trim and packaging too.
Keep any material that tested positive for asbestos out of the dumpster and follow your abatement contractor's disposal instructions. If you're also breaking out a slab, step or mortar bed, see how to dispose of concrete after demolition.
Tile Removal Questions
How hard is it to remove tile flooring?
It's physically demanding more than technically difficult. Tile set in thinset on plywood or backer board is a reasonable DIY job. Tile on a thick mortar bed, large areas of porcelain, or floors with suspected asbestos layers underneath are the cases where hiring a pro makes sense.
How long does it take to remove a tile floor?
A small bathroom can often be done in a day by one person with hand tools. Larger rooms, mortar beds and thinset cleanup add time, so plan a full weekend for a kitchen and line up power tools for anything bigger.
Can you remove floor tile without breaking it?
Sometimes, but don't count on it. Tile set well in thinset usually cracks as it comes up. If you need spares for repairs, cut the grout out around a few tiles first and work them loose slowly with a thin chisel; some will still break.
Where do you dispose of old floor tile?
Small amounts may be accepted by your local transfer station or landfill. Check your municipality's rules first. For a full room or more, a dumpster rental lets you load as you work instead of making multiple trips.
Can you remove tile from a wood subfloor?
Yes. Work at a low angle so the chisel slides under the tile instead of gouging the plywood. If the tile was set on backer board, it's often faster to remove the board and tile together.